

How To Increase Screen Size On Mac
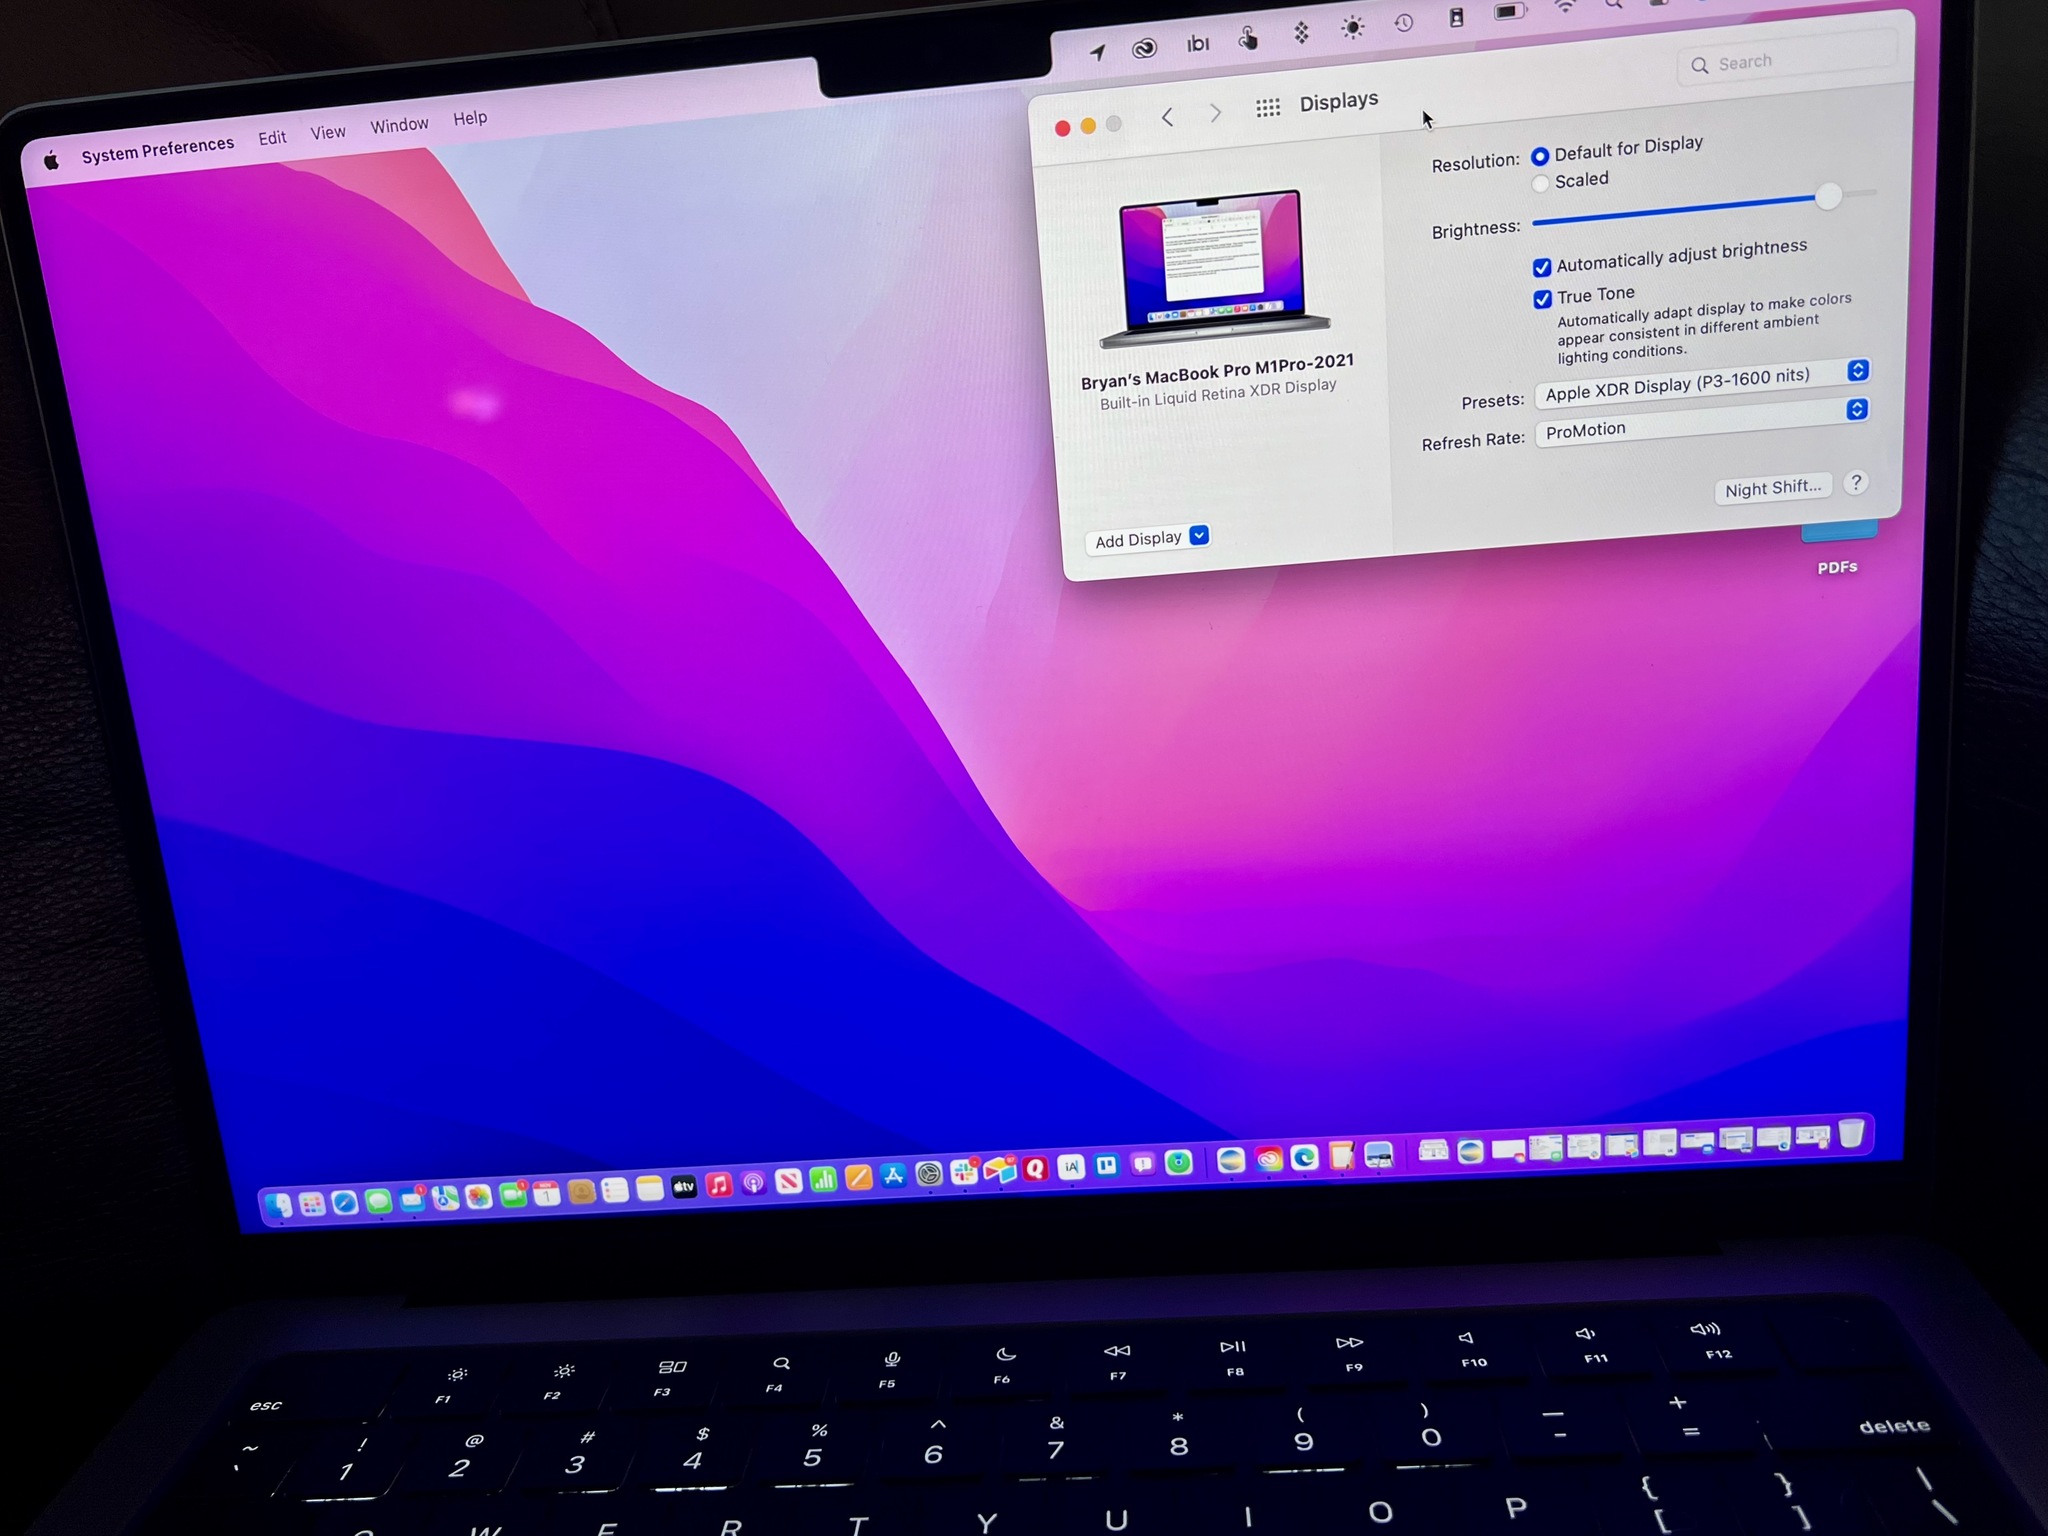 Source: Bryan M. Wolfe / iMore
The 14-inch and 16-inch MacBook Pro (2021) models are the first Macs to characteristic a Liquid Retina XDR display. These powerful displays permit customization missing on other Apple tree products.
Hither'southward a look at how to adapt display settings on Apple tree's newest laptops, amidst the best MacBooks on the market.
How to change the resolution
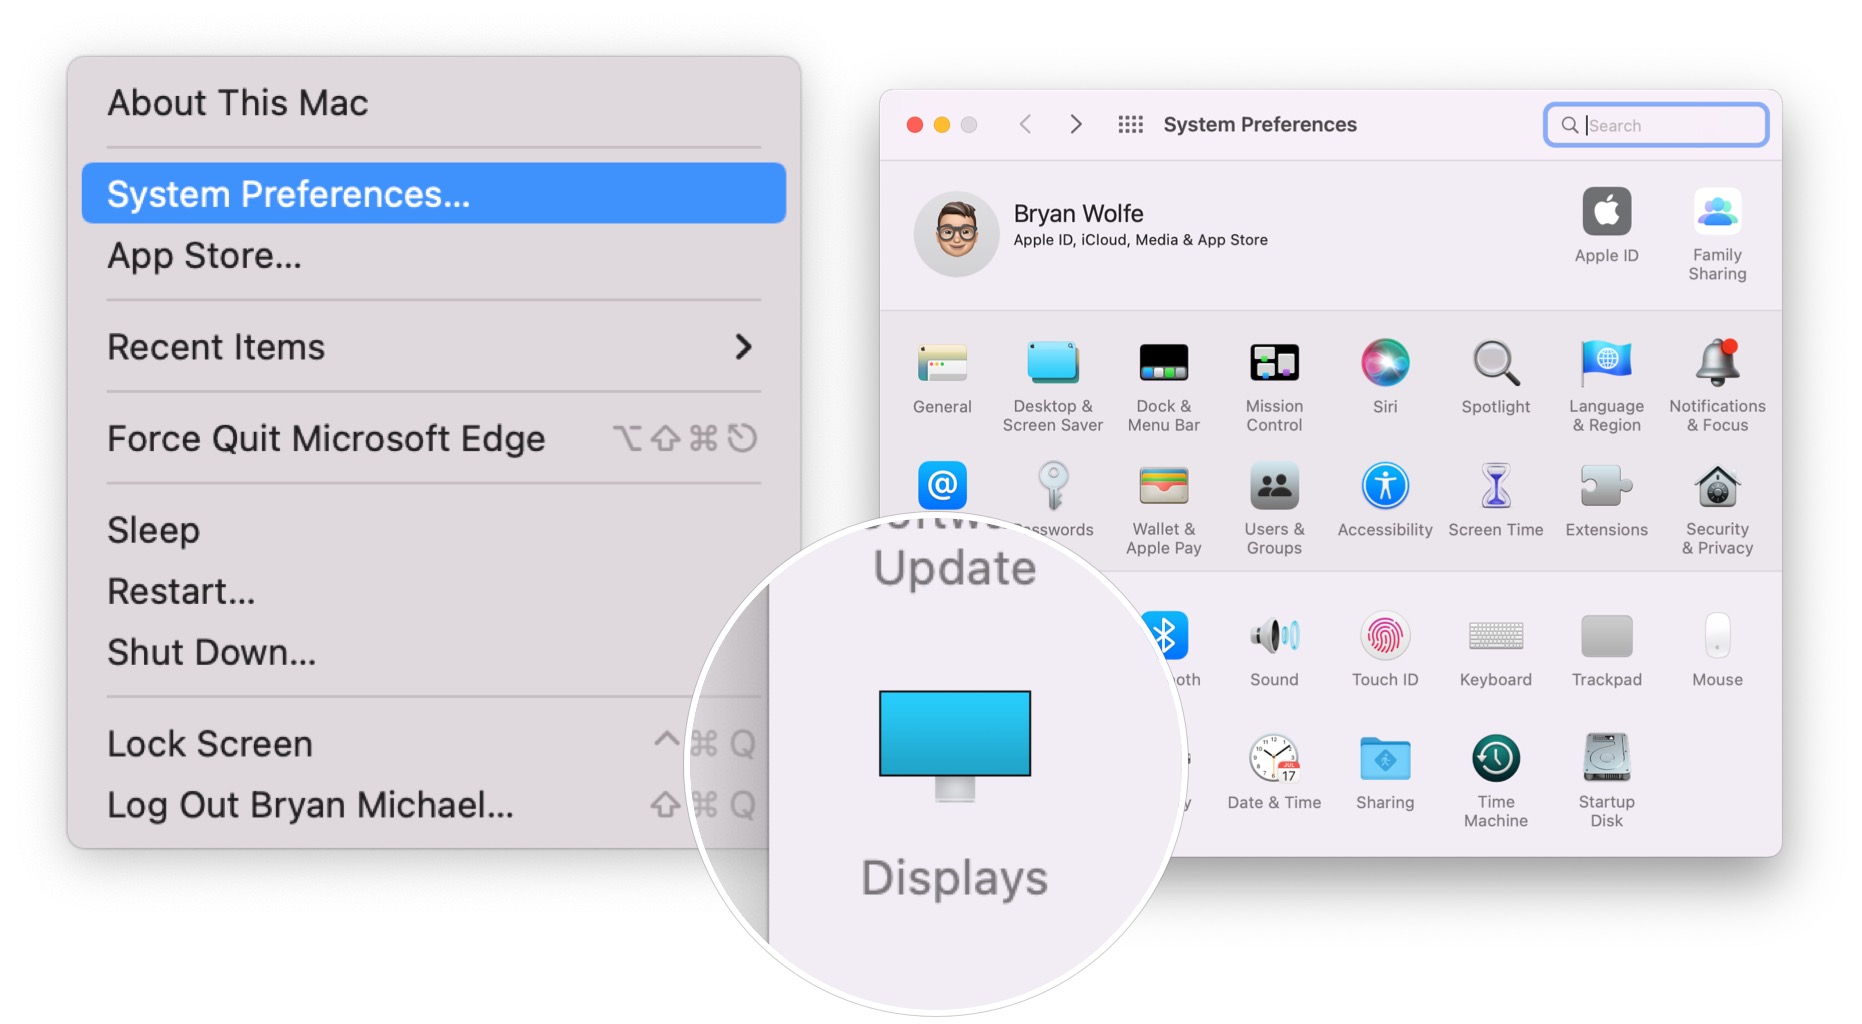
To change the Resolution on your MacBook Pro (2021):
- Click on the Apple menu at the top left of the display.
- Select System Preferences.
-
Cull Displays.
 Source: iMore
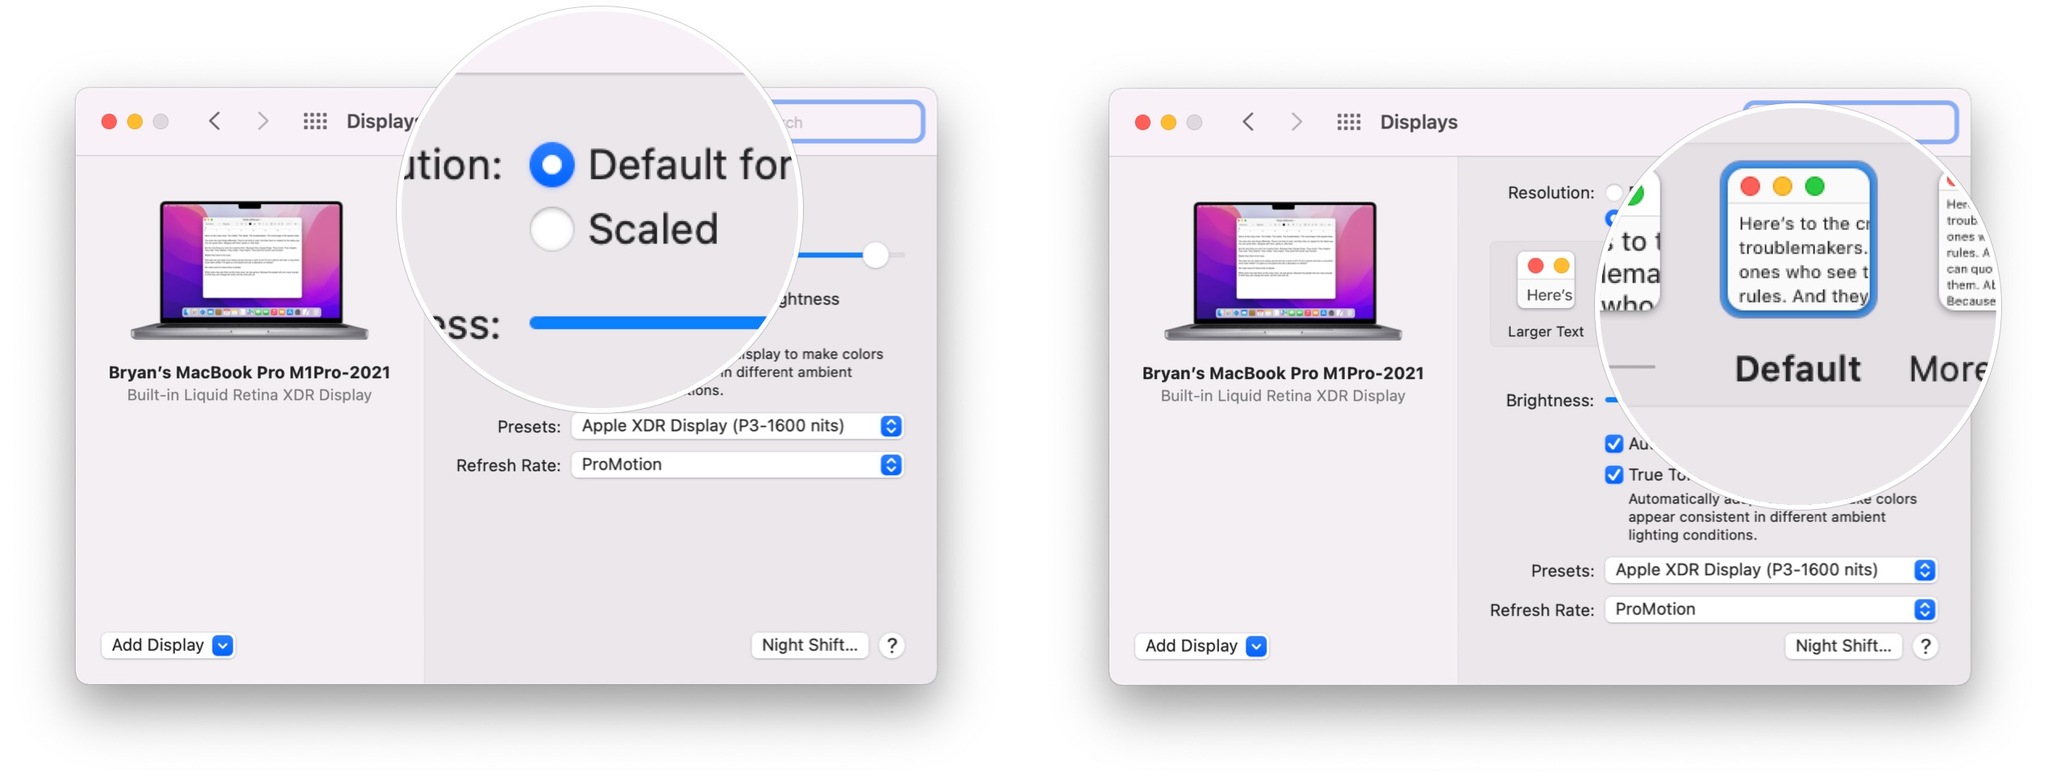
 - Click Scaled if the Resolution is fix to Default for brandish.
-
To brand text larger, click on one of the boxes to the left of Default. To make more infinite on the screen so yous can see more things, click one of the boxes to the right of Default.
 Source: iMore


Change the refresh charge per unit
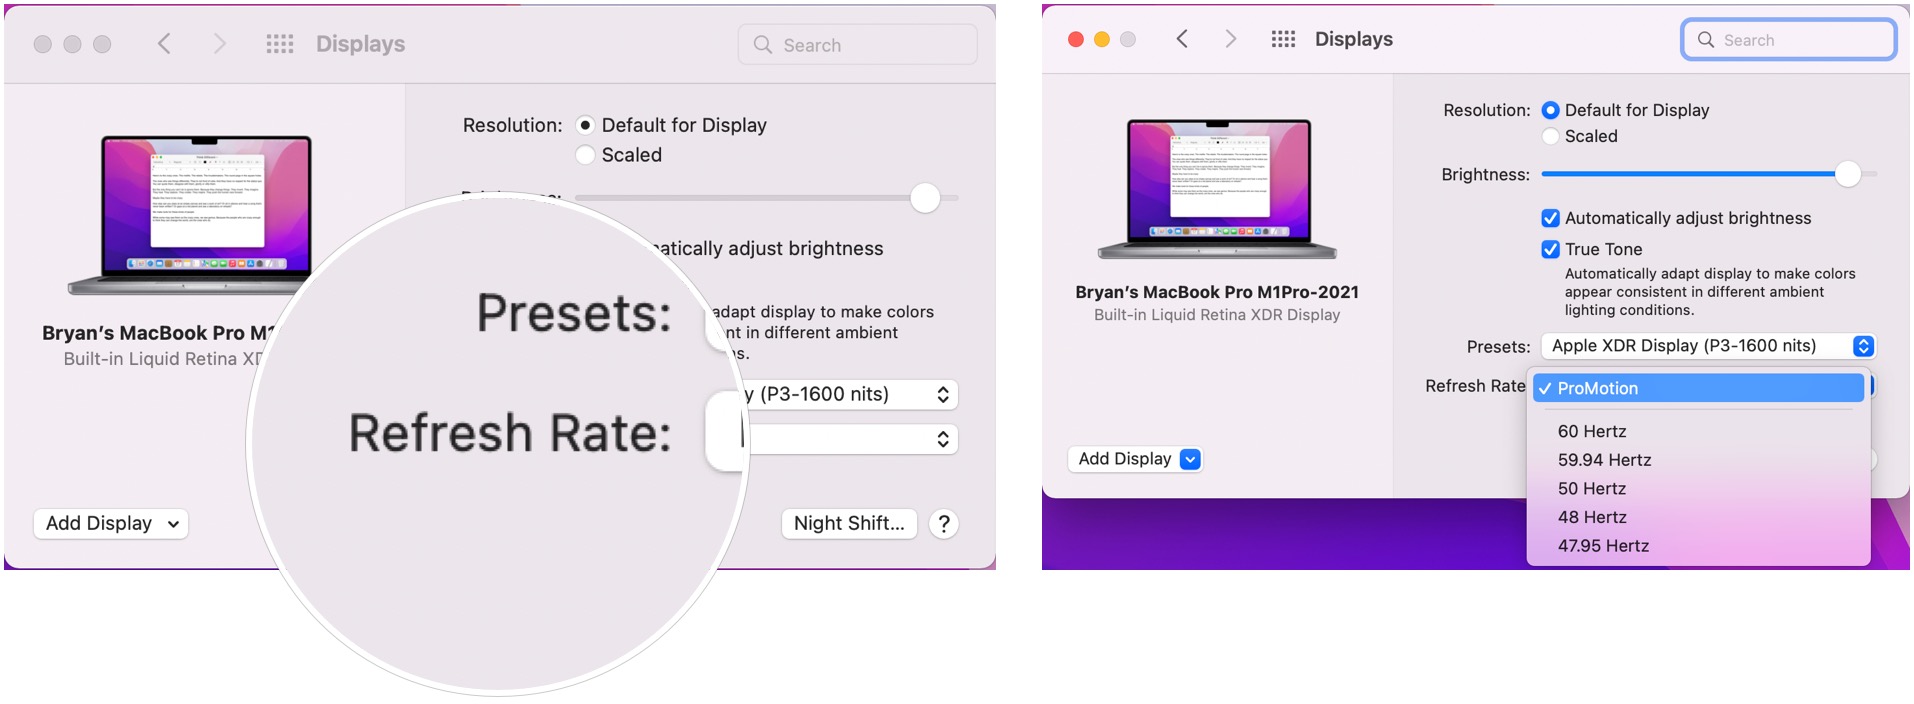
The MacBook Pro (2021) and Apple Pro Brandish XDR include the ability to change the refresh rate. For professional workflows like video editing, you can fix your display'south refresh rate to align with the frame rate of the video yous're using.
Available refresh rates include 60 Hertz, 59.94 Hertz, fifty Hertz, 48 Hertz, and 47.95 Hertz. Additionally, the MacBook Pro (2021) allows you to select ProMotion for an adaptive refresh rate of 120Hz.
If you decide to conform the refresh rate, choose the one that divides evenly into the frame rate of your content. For example, if the content you're viewing is 24 frames per second, select the 48 Hertz refresh rate.
To change the refresh rate:
- Click on the Apple bill of fare at the elevation left of the display.
- Select System Preferences.
-
Choose Displays.
Source: iMore -
Click the Refresh Rate pop-upwards carte and choose a refresh rate.
 Source: iMore

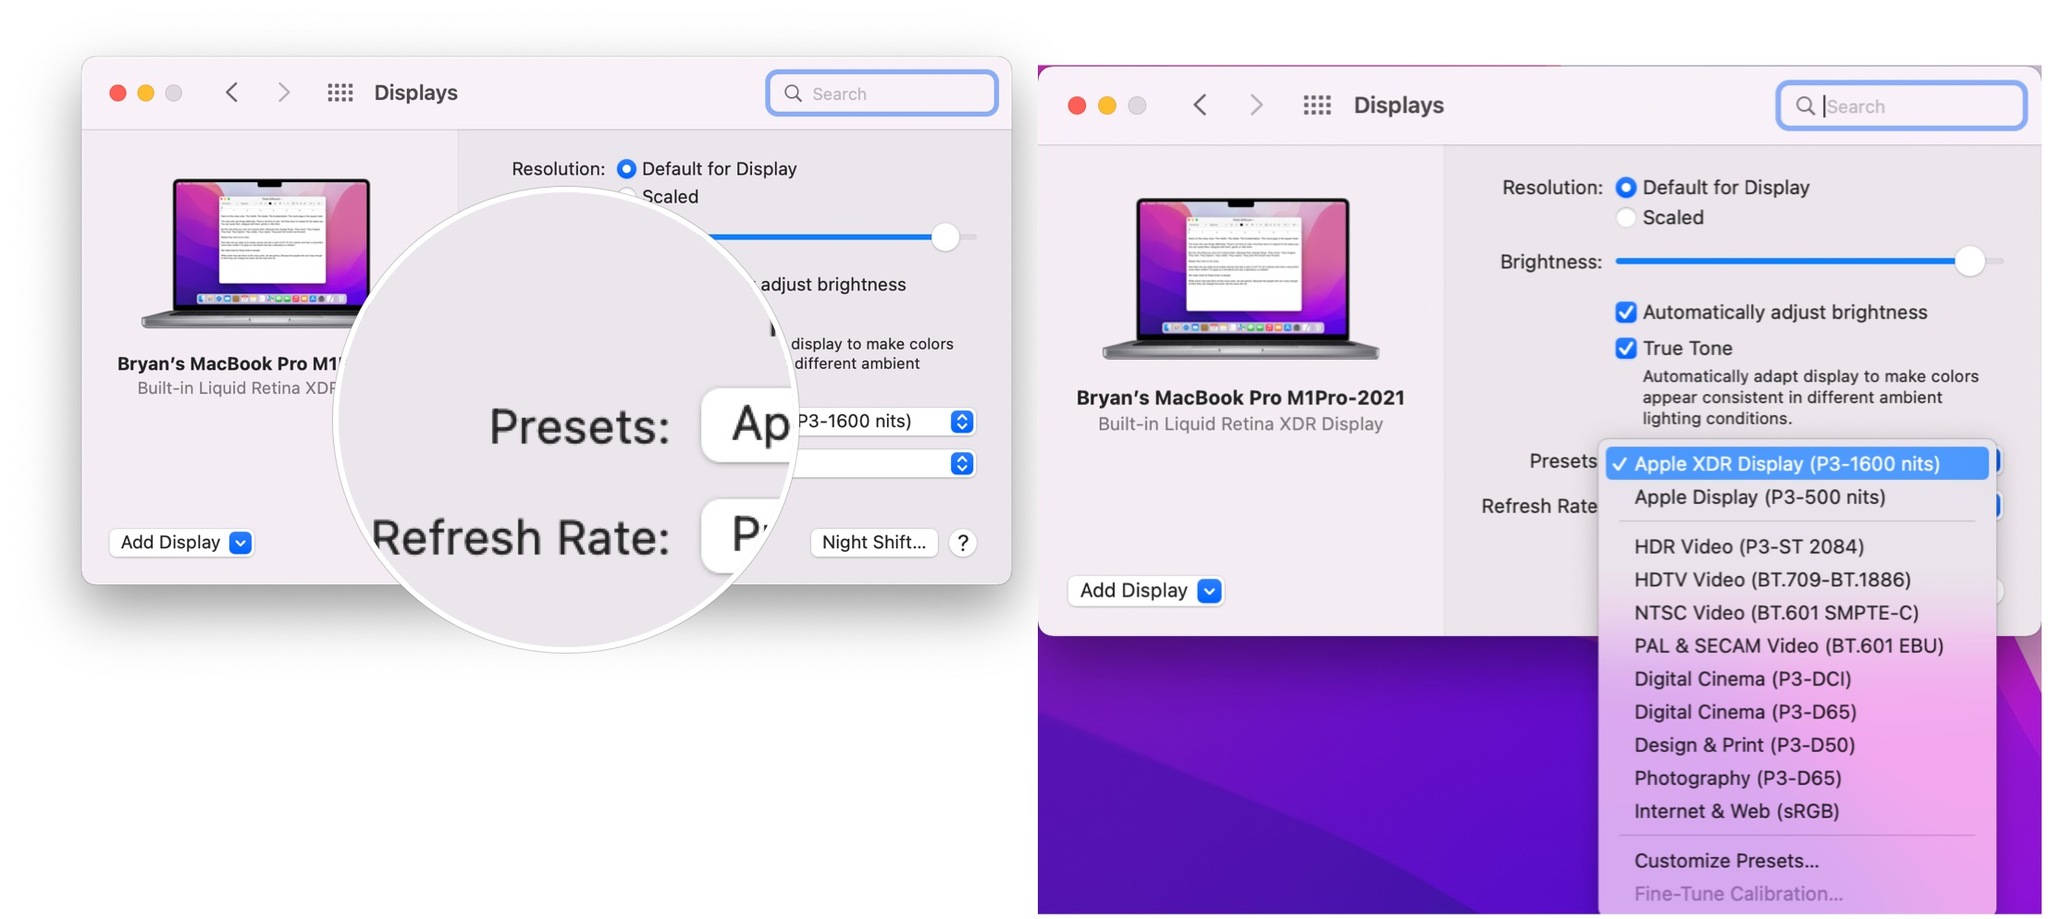
Adapt reference modes
You lot can likewise adapt reference modes on the MacBook Pro (2021). These modes comprehend typical content cosmos workflows across several media types.
To adjust reference modes:
- Click on the Apple tree menu at the acme left of the display.
- Select Organization Preferences.
-
Choose Displays.
Source: iMore -
Click the Presets pop-upward menu and choose a reference style.
 Source: iMore

You tin can also suit the reference modes by clicking on the AirPlay bill of fare, when applicable, on the menu bar, then clicking Reference Modes.
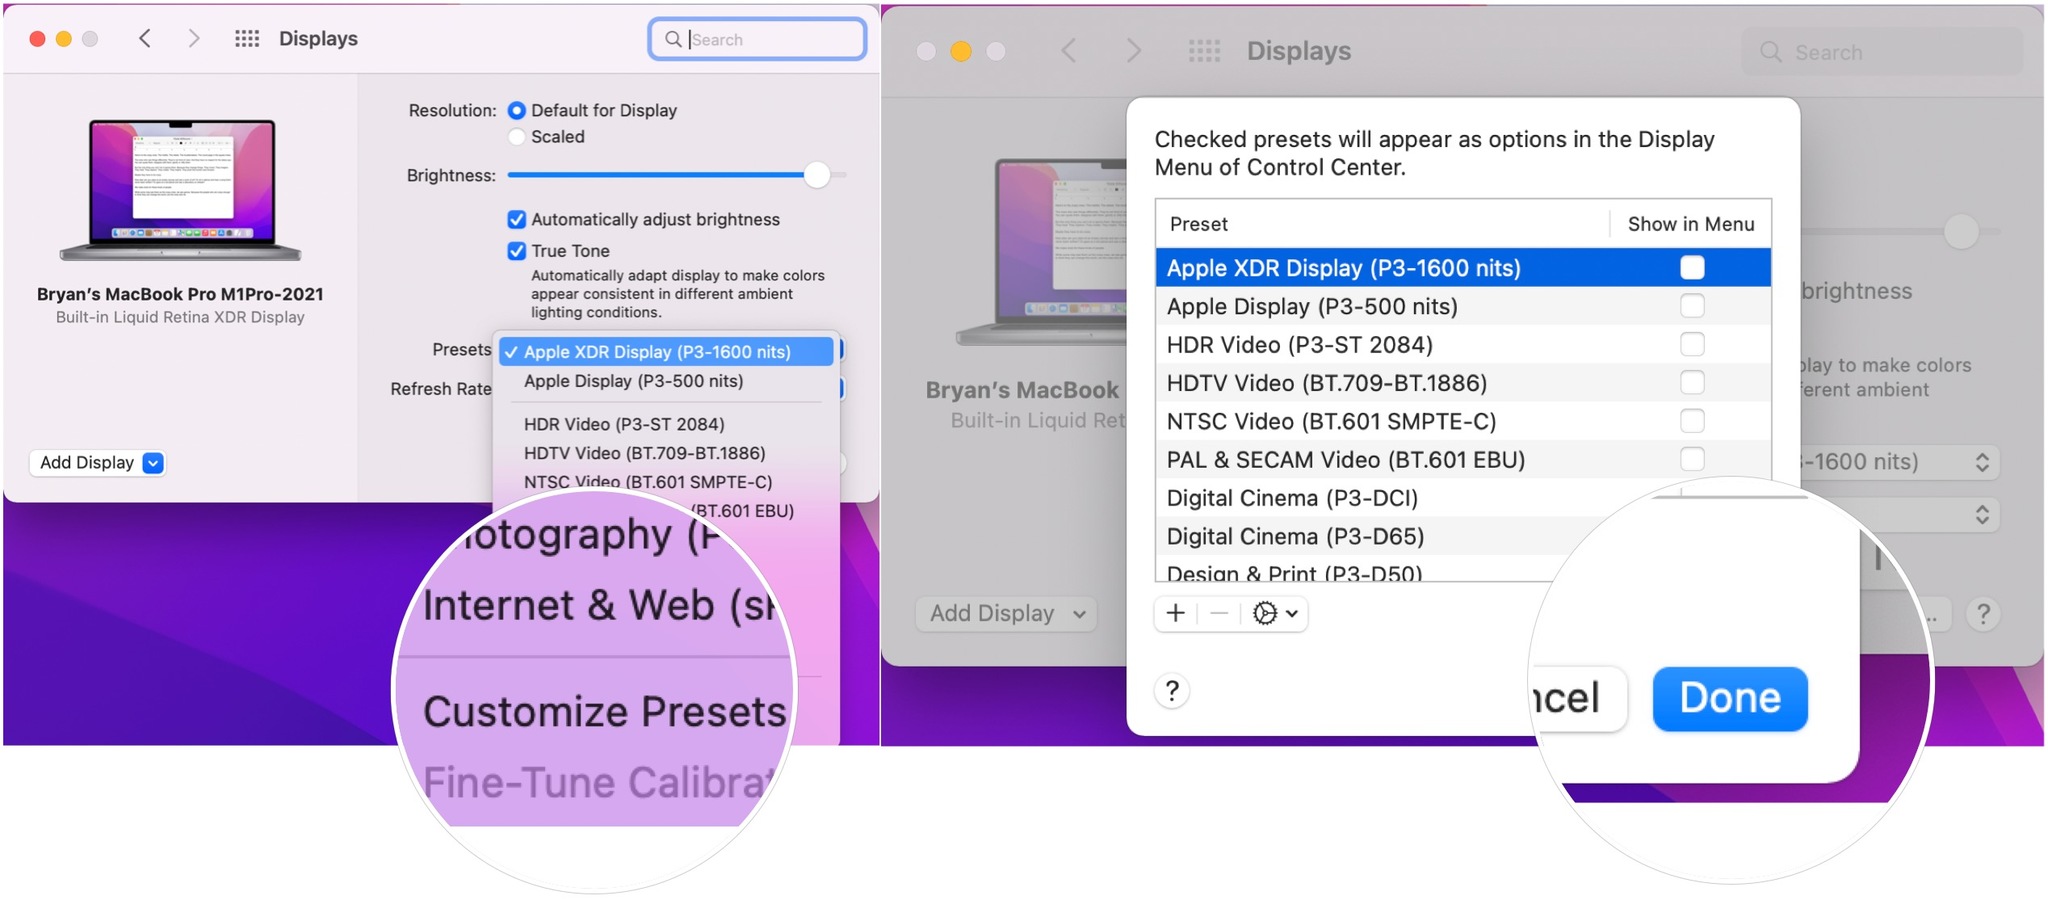
To cull favorite reference modes:
- Click on the Apple menu at the top left of the display.
- Select Organisation Preferences.
-
Cull Displays.
Source: iMore - Click the Presets popular-up menu.
- Select Customize Presets.
- Choose the reference modes that you want to use.
-
Click Washed.
 Source: iMore

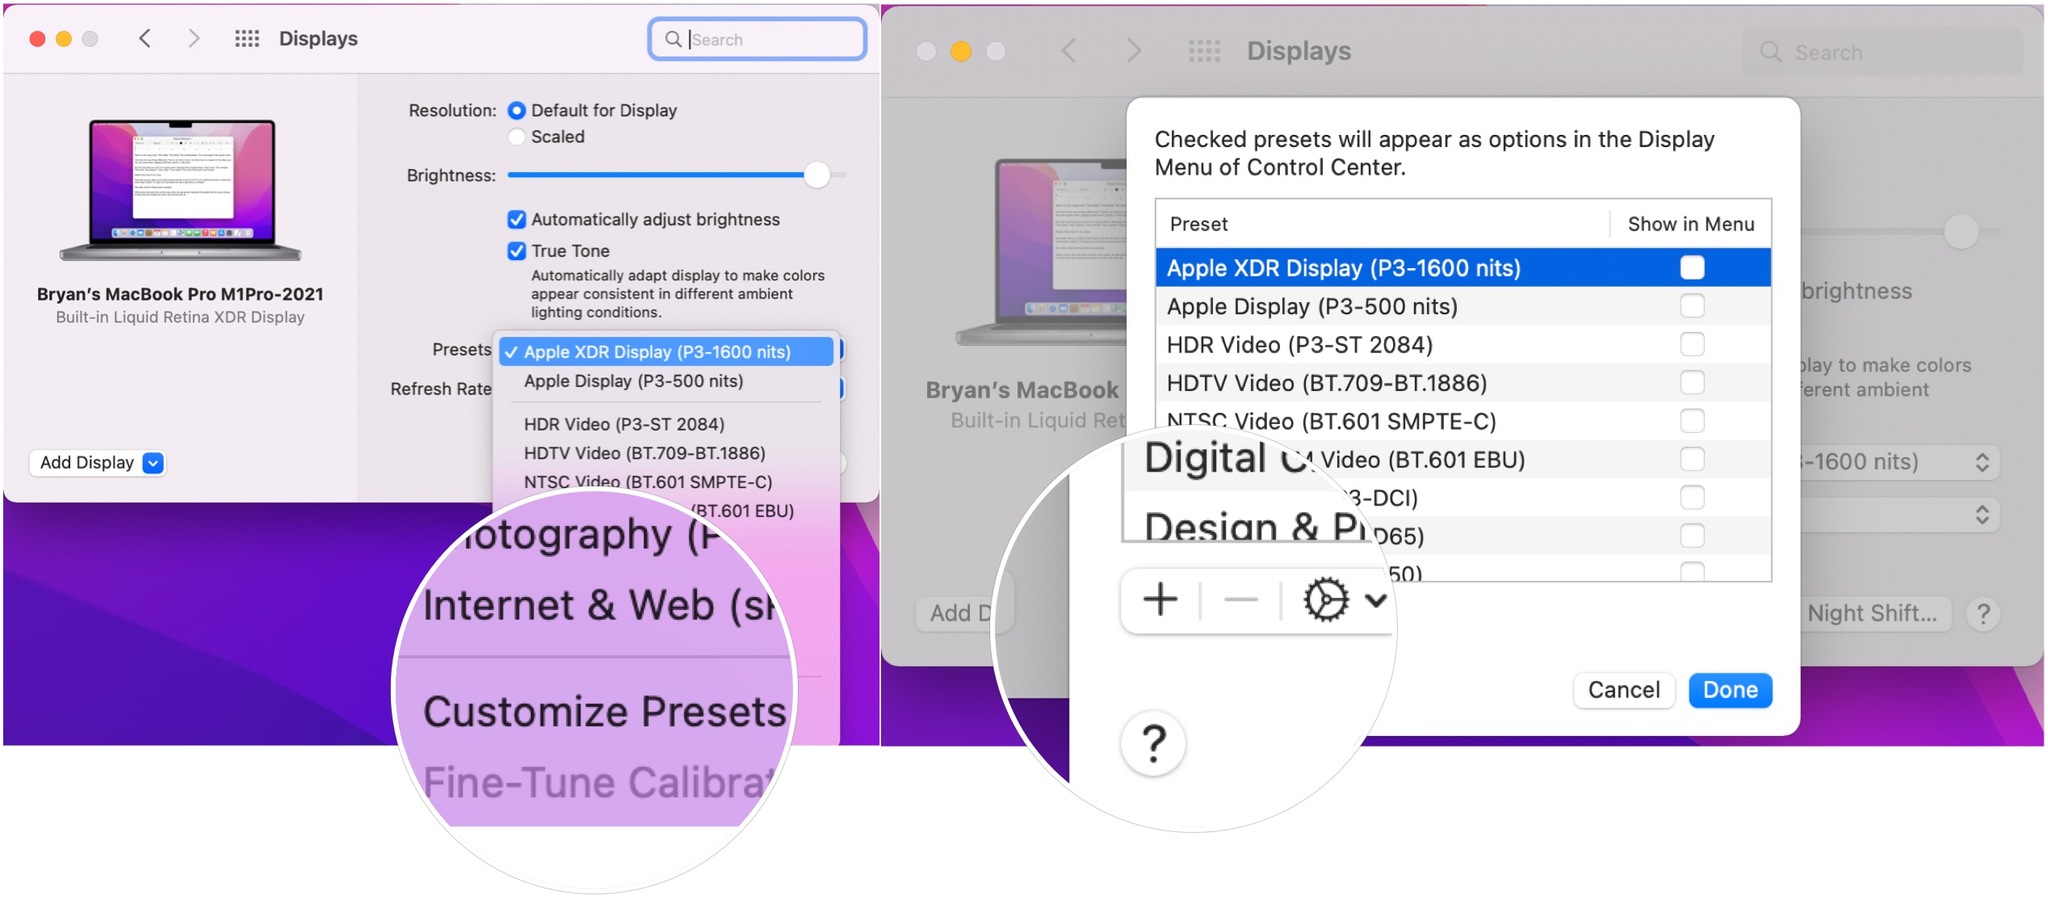
To create custom reference modes:
Advanced users can besides create custom reference modes tailored to unique workflows. In doing so, you can select from several color gamut, white signal, luminance, and transfer function options.
- Click on the Apple tree menu at the top left of the brandish.
- Select System Preferences.
-
Choose Displays.
Source: iMore - Click the Presets pop-up menu.
- Select Customize Presets.
-
Choose the + icon at the lesser left.
 Source: iMore
 - Choose a preset name.
- Make your adjustments.
-
Select Save Preset.
 Source: iMore


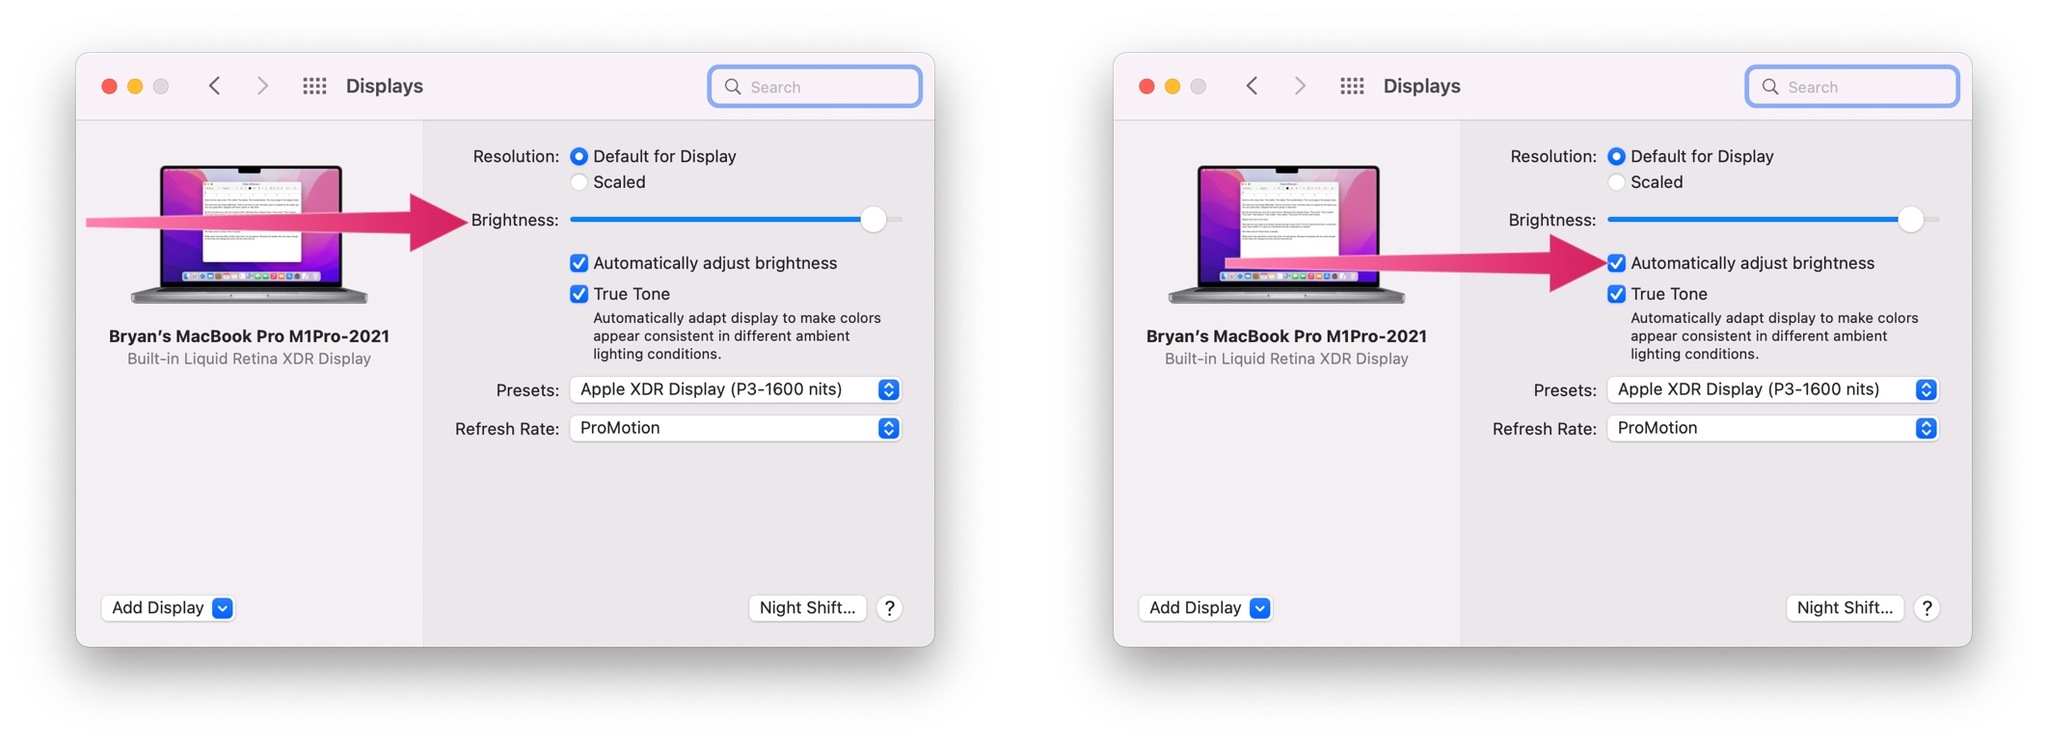
Adjust effulgence
To adjust the brightness on your laptop:
- Click on the Apple tree card at the tiptop left of the display.
- Select System Preferences.
-
Choose Displays.
Source: iMore - Utilise the slider to adapt the brightness, if applicable.
-
Check/Uncheck Automatically conform brightness to match your needs.
 Source: iMore

All washed!
The MacBook Pro (2021) offers 1 of the all-time displays ever seen on a laptop. Use the handy born tools to arrange the display settings as needed, customizing your Mac experience further.

How To Increase Screen Size On Mac,
Source: https://www.imore.com/how-adjust-display-settings-macbook-pro-2021
Posted by: brownbeffers1998.blogspot.com
0 Response to "How To Increase Screen Size On Mac"
Post a Comment